![]()
Working with Rulesets
After creating a Ruleset, you typically add rules to it via the View Ruleset screen.
The View Ruleset screen is the launch pad for working with existing Rulesets.
Edit a Ruleset
See Also: Working with Rulesets
You can initiate editing a Ruleset from two different locations, the Web page or the Workarea. To edit a Ruleset from the Web page, navigate to a Business Rule on a Web page while logged in. Then, right click the Business Rule icon and click Edit.
If editing from the Workarea, choose Settings > Business Rules and then click the Ruleset to edit. Next, click Action > Edit Ruleset.
The Edit Ruleset screen appears.
Remove a Rule From a Ruleset
Follow these steps to remove a rule from the Ruleset.
1. Navigate to the Edit Ruleset screen, as explained in Edit a Ruleset.
2. Highlight the rule you want to remove.
Warning! The check box associated with the rule must be empty for you to remove the rule. If the check box is not empty, the rule will look as though it has been removed
3. Click Remove Rule ( ).
).
4. A pop up appears letting you know that the rule will be removed from this Ruleset only.
5. Click OK.
6. The rule is removed from the Edit Ruleset screen.
7. Click Save ( ).
).
Change the Order of Rules in the Ruleset
The order of rules in a Ruleset affects how rules are applied when a site visitor views a page. For example, you want to display a welcome message before a content item. To accomplish this, move the rule for the welcome message above the rule for a content item.
Follow these steps to change the order of the rules in a Ruleset.
1. Navigate to the Edit Ruleset screen, as explained in Edit a Ruleset.
2. Highlight the rule you want to reorder.
3. Click Move Up ( ) or Move Down (
 ) to move the rule up or down the list.
4. Click Save ().
Delete a Ruleset
When you delete a Ruleset, it is removed from the system permanently. However, rules included in a Ruleset are not deleted. This is because a rule can be used in multiple Rulesets.
Follow these steps to delete a Ruleset.
1. Navigate to the Edit Ruleset screen, as explained in Edit a Ruleset.
2. Click Delete Ruleset (![]() ).
).
3. A dialog asks you to confirm the deletion.
4. Click OK.
Add a New Rule to a Ruleset
Adding a new rule is easy with Ektron CMS400.NET. Just click Add on the View Ruleset screen. The Rules Wizard launches and helps you define a rule.
Follow these steps to add a new rule to your Ruleset.
1. If you arrived here from the section, continue to the next step.
Otherwise, navigate to the Business Rules screen in the Workarea by clicking Settings > Business Rules. Next, click the Business Rule for which you want to create a new rule.
2. Click Add New (![]() ).
).
3. The Rules Wizard launches.
4. Step 1 prompts you to create conditions for the rule and decide whether a site visitor needs to match Any or All conditions. Clicking the param and value links opens a dialog to enter information.
Place a check next to any condition you want to use. Use the table below to help you fill out the param and value fields.
|
Condition |
Description |
Example |
|
The Cookie param equals value |
Use a cookie for this condition. param - enter Name in this field. value - enter the name of the cookie in this field. |
Does the site visitor's system have an Ektron cookie? Usage: The Cookie param “Name” equals value “Ektron” |
|
The Form param equals value |
Use a form elements field name and match the value entered into the element. param - enter a form’s element Field Name from a form. value - enter the value you want the form element to match. |
A form has a Choices Field element with the Field Name “Favorite_Food” and choices of Pizza, Steak and Chicken. When a site visitor chooses Pizza and clicks submit, your rule launches a Pizza company’s Web site. Usage: The Form param “Favorite_Food” equals value “Pizza” |
|
The QueryString param equals value |
Use the QueryString for this condition param - the name of the QueryString. For example, ID. value - the value associated with the parameter. For example, 18. |
Is content with the ID of 18 being displayed? Usage: The QueryString param “ID” equals value “18” |
|
The Server Variable param equals value |
Use server variables from the site visitor. param - enter the name of a server variable. For example, HTTPS. value - the value associated with the parameter. For example, On. |
Is the site visitor’s browser using SSL? Usage: The Server Variable param “HTTPS” equals value “On”
|
|
A list of server variables and their descriptions can be found at http://msdn.microsoft.com/library/default.asp?url=/library/en-us/iissdk/html/21b3be8f-d4ed-4059-8e21-6cba2c253006.asp. |
||
|
The Custom param equals value |
Use custom parameters from the user. User parameters are defined in the codebehind of a web page. param - enter the name of a custom parameter. For example, AcctBlnc value - the value associated with the parameter. For example, 1000 |
Is the user's account balance $1000? Usage: The Custom param “AcctBlnc” equals value “1000” |
5. Click Next.
Step 2 of the Wizard prompts you select an action to take if conditions are true. Check the boxes for the actions to take. Click the blue links to add the appropriate information.
|
Action |
Description |
|
Display Calendar ID |
Enter a Ektron CMS400.NET Calendar ID. |
|
Display a Message |
Enter a message to be displayed. |
|
Open URL |
Enter a URL. This opens a new window with the URL. |
|
Popup A Message |
Enter a message that appears in a popup dialog box. |
|
Redirect to a URL |
Enter a URL to redirect a the site visitor’s browser. |
|
Set Cookie to Value |
Creates a cookie on the site visitor’s system. Enter Name for Cookie and the name of the cookie for Value. |
|
Display Content Block ID |
Enter a Ektron CMS400.NET content block’s ID. |
6. Click Next.
7. Step 3 of the Wizard lets you select actions to take when conditions are false. This works the same as Step 2 of the Rules Wizard. For descriptions of the actions, see Conditions Table.
8. Click Next.
9. Step 4 of the Wizard asks you to enter a name for the rule in the text box.
10. Click Done.
11. The View Ruleset screen appears. Your rule appears in the Ruleset box.
Add an Existing Rule to a Ruleset
Because rules are not tied to a Ruleset once they are created, you can add a rule to more than one Ruleset. To add an existing rule to a Ruleset, follow these steps:
1. If you arrived here from the section, continue to the next step.
Otherwise:
Navigate to the Business Rules screen in the Workarea by clicking Settings > Business Rules. Next, click the name of the Business Rule for which you want to add an existing rule.
2. Choose New > Add Existing.
3. The Add an Existing Ruleset screen appears.
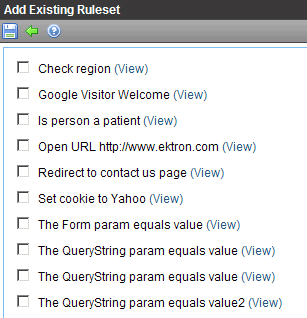
4. Check the rules to add to the Ruleset.
5. Click Save ().
Edit a Rule in a Ruleset
Following these steps to edit a rule in a Ruleset.
1. In the Workarea, navigate to Settings > Business Rules.
2. Select the Ruleset that contains the rule to be changed.
3. Highlight the rule to be changed.
4. Choose Action > Edit Rule.
5. The Rules Wizard appears with the rule loaded. Edit as necessary. The Rules Wizard is explained in Add a New Rule to a Ruleset.
Viewing a Rule in a Ruleset
To help you understand the contents of a rule, a (View) link appears next to each rule in a Ruleset. Click this link to launch a view window for the rule. This window displays settings for each Rules Wizard step applied to a rule.
Note: The steps are not editable from this window. To edit rules in a Ruleset, see Edit a Rule in a Ruleset.
To navigate through the steps, click the Previous and Next Step buttons ( ). To close the window, click Close.


![]()